I'll be honest: my first minute in Merge Tanks felt like I'd accidentally opened a spreadsheet designed by someone who really loves armored vehicles. You get a grid, a handful of low-tier tank silhouettes, and absolutely
I'll be honest: my first minute in Merge Tanks felt like I'd accidentally opened a spreadsheet designed by someone who really loves armored vehicles. You get a grid, a handful of low-tier tank silhouettes, and absolutely zero hand-holding. I dropped a couple of identical light tanks next to each other, watched them fuse into something slightly less pathetic, and thought, "Okay, that's cute." Then an enemy wave rolled in and wiped half my board before I even figured out which tank was supposed to be shooting.
By minute four I was hooked. Not because the game is flashy — it's not — but because the merge mechanic here isn't just a dopamine button. Every fusion you make is a bet on your ability to hold the line until that new unit starts earning its tile space. I lost my first three runs in under ten minutes each, and every single loss came down to a decision I made thirty seconds earlier that I knew was greedy.
What You're Actually Doing Here
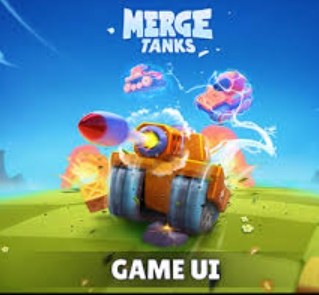
On the surface, Merge Tanks is a lane-defense game with a merging inventory system. You spawn basic tank units onto a grid, drag identical units together to create higher-tier versions, and those tanks auto-attack enemies that advance from the right side of the screen. If enemies reach your left wall, you take damage. Run out of health, run's over.
But the layer underneath that is what separates a fifteen-wave run from a fifty-wave run: you're managing a spatial economy where every tile is a resource, and merging is the only way to free up tiles without losing firepower. A tier-1 tank takes one tile and does almost nothing. Two tier-1s merged into a tier-2 still take one tile, but now that tile outputs roughly double the damage. The math sounds simple until you're halfway through a wave, your board is clogged with units you can't match, and the merge you desperately need is one tier-1 short of happening.
Gold — let's call it credits, since that's what the game uses — trickles in from enemy kills. You spend credits to spawn new basic tanks from a shop sidebar. The shop also occasionally offers higher-tier units directly, but the cost scaling is steep enough that buying a tier-3 outright usually feels like a trap unless you're in an emergency. I've found the sweet spot is buying tier-1s in pairs, sometimes triples, to set up merges that chain into tier-3s and tier-4s without burning your entire credit stash.
The Combo System Nobody Talks About
Here's where the game gets quiet about its own mechanics. When you merge two tanks, the resulting unit enters the field with a brief "fresh deploy" state — it fires immediately, ignoring whatever internal cooldown its tier normally has. If you chain multiple merges in quick succession, you effectively create a burst-damage window that can clear a wave segment faster than your static DPS numbers would suggest.
I didn't notice this until maybe my eighth or ninth run. I was merging a pair of tier-2s into a tier-3 right as a clump of fast-moving scout enemies appeared, and the tier-3 unloaded three shots in the time it'd normally fire one. That's the combo. The game never tells you about it, and there's no visual indicator beyond the attack animation playing faster than expected. Once I started timing my merges to coincide with enemy clusters rather than merging whenever I had a match available, my wave survival jumped noticeably.
There's also a positional combo element. Higher-tier tanks have splash damage or piercing shots — the tier-4 artillery unit, for example, lobs a shell that hits a small area. If you merge into a tier-4 while enemies are bunched up near a corner of the lane, that initial burst can delete three or four units that would otherwise leak through. The trick is resisting the urge to merge immediately when you see two matching tanks. Holding a pair for ten or fifteen seconds until enemies stack up is often the difference between a clean wave and bleeding health.
One more thing: merging a tank that's currently under attack seems to reset enemy targeting briefly. I can't prove this is intentional, but I've used it repeatedly to save a damaged tier-3 by merging it with a fresh tier-3 to create a tier-4 at full health. Enemies that were locked onto the damaged unit pause for a split second, and in that pause your other tanks often finish them off. It's a tiny window, but it's saved my left wall more times than I can count.
High-Value Moves Worth Building Around
After about twenty runs, I started recognizing patterns that consistently produce strong board states. These aren't cheats or exploits — just reliable plays that the game's economy and timing reward if you set them up correctly.
The double-spawn opener. In the first wave, buy two tier-1 tanks immediately and merge them. You now have one tier-2 and enough credits left to buy a third tier-1. Place the tier-2 in the center lane if the grid has lanes, or toward the front of your formation if it's open-format. That tier-2 will carry you through the first three waves almost by itself, which lets you bank credits instead of panic-buying. I used to spawn four or five tier-1s early and ended up with a board full of mismatched units that couldn't merge. The double-spawn into early tier-2 keeps your tile count low and your merge options open.
The emergency tier-4 fund. Around wave ten to twelve, enemy health scales enough that tier-2 tanks start feeling like peashooters. If you haven't set up at least one tier-4 by then, you're probably about to lose. I now keep a mental rule: by wave eight, I want either two tier-3s of the same type (ready to merge into a tier-4) or enough credits to buy my way into one. The shop sometimes offers a tier-3 directly for a premium — if I'm sitting on one tier-3 and see its match in the shop, I'll pay the markup every time. The consistency of having a tier-4 online by wave ten outweighs the credit inefficiency.
The backline shuffle. Once your board has six or more tanks, positioning matters more than the tier numbers suggest. Splash-damage tanks should sit in the center where their area-of-effect overlaps the most lanes. Single-target high-damage tanks — the sniper-type units — belong on the edges to pick off stragglers that leak past the splash zone. I spent my first several runs just placing tanks wherever there was an empty tile, and I'd watch enemies slip through gaps that a simple reposition would've closed. You can drag tanks around between waves, and the game gives you a generous prep phase. Use it.
The sacrifice merge. Sometimes you have three tier-2s — two that match and one that doesn't. The obvious move is to merge the matching pair and keep the odd one out. But if that odd tier-2 is sitting in a high-traffic lane and you have credits to spare, consider buying a tier-1 that matches the odd tier-2's type, merging those into a tier-3, and accepting that you've now spent credits on a unit you technically already had. The tempo gain from upgrading a key position often justifies the cost. I've lost runs trying to be too efficient, waiting for a natural match that showed up two waves too late.
Mistakes That End Runs Early
I've made every one of these at least three times. They're the kind of mistakes that feel fine in the moment and catastrophic thirty seconds later.
Filling every tile. When your board is full, you can't spawn new units. That means you can't buy a matching tier-1 to complete a merge. I've had runs where I had two tier-3s sitting next to each other, ready to become a tier-4, but no empty tile to spawn the tier-1 that would chain into the missing piece. Now I treat empty tiles as a resource, same as credits. I never go above 80% board capacity unless I'm actively setting up a merge that will clear space immediately.
Ignoring unit type matchups. Some enemies have armor that reduces damage from certain tank types. The game communicates this through subtle visual cues — armored enemies have a slightly different border or color tint — and it's easy to miss when you're focused on merging. I lost a run at wave seventeen because my entire board was built around high-rate-of-fire light tanks, and the wave threw armored heavies that my shots just plinked off. One or two anti-armor units mixed into your formation makes a huge difference, even if they're a tier lower than your main damage dealers.
Merging too early in a wave. The fresh-deploy burst I mentioned earlier is powerful, but it's a one-time effect per merge. If you blow your merge combo at the start of a wave when only three weak enemies are on screen, you'll have nothing left for the dense cluster that follows. I now wait until the wave's midpoint — usually when the enemy spawn rate increases — before executing any merges I've been holding.
Undervaluing the shop refresh. The shop offers new units periodically, and you can spend a small amount of credits to refresh it manually. I ignored the manual refresh for my first ten runs because it felt like wasting money. But when you're one specific tier-1 away from a tier-3 merge and the shop is showing units you don't need, paying for a refresh is cheaper than buying random units hoping for a match. The refresh cost scales slowly enough that using it two or three times per run is almost always net positive.
Phone vs Desktop: It Matters More Than You'd Think
I played my first batch of runs on desktop, then switched to my phone during a commute. The difference was jarring. On desktop, dragging units is precise — you can see the whole board, and misclicks are rare. On a phone screen, especially if you have normal-sized thumbs, dragging a tank into a specific tile when your board is crowded becomes an exercise in frustration. I merged the wrong pair at least four times on mobile, once turning two tier-3s into a tier-4 that I'd been saving for a different merge chain entirely.
If you're on mobile, give yourself an extra second per drag. Zoom in if the game supports it. I also found that playing in landscape mode (if your device allows rotation) gives you more horizontal space, which helps with the lane-based layout. On desktop, you can comfortably manage a board with ten to twelve units. On mobile, I'd cap my board at eight or nine just to keep the tiles distinguishable.
Performance-wise, the game runs fine on both. I tested on a three-year-old Android phone and a mid-range laptop; neither struggled even in later waves with lots of projectiles on screen. That's worth mentioning because some browser merge games start chugging once the unit count climbs, and Merge Tanks stayed smooth through wave thirty-plus on both devices.
A Practice Plan That Actually Builds Skill
If you're coming in fresh, the game's lack of tutorial can make the first few runs feel like you're flailing. Here's a short progression that helped me go from dying at wave eight to consistently hitting wave twenty-five within an afternoon of play.
First, do a run where you don't try to win. Seriously. Just spawn units, merge whatever matches, and watch how enemies behave. Notice which enemy types move fast, which ones soak damage, and when the spawn rate increases. You'll die early, but you'll die with information. Pay attention to how long it takes a tier-2 to kill a basic enemy versus an armored one. That timing knowledge pays off later when you're deciding whether to merge or hold.
Second, do a run where you follow a strict "merge only in pairs" rule. Never merge three tier-1s at once if you can avoid it — merging two leaves the third stranded. This run will teach you the rhythm of buying units in multiples of two and keeping your board balanced. You'll probably still lose around wave twelve, but your board state at the moment of death will look cleaner than before.
Third, do a run focused entirely on reaching one tier-5 unit. Tier-5s are game-changers — high damage, often with special effects like stuns or area denial. To get one, you need sixteen tier-1s of the same type merged upward through the chain. That forces you to plan ahead, manage board space aggressively, and use the shop refresh strategically. Even if you die right after building it, you'll understand the merge chain economy at a level that casual play won't teach you.
Fourth, play a run where you consciously delay every merge until the second half of each wave. This feels unnatural at first — you'll have matching pairs sitting on your board, practically begging to be combined — but it trains you to recognize enemy density patterns and exploit the burst-damage window. After a few waves, you'll start seeing the exact moment when a merge will hit the most targets.
By the time you've done these four practice runs, the game's loop will feel intuitive rather than reactive. You'll read waves before they arrive, keep your board flexible, and spot merge opportunities two or three steps ahead. That's the real skill ceiling here — not faster dragging or quicker reactions, but the ability to plan merges around wave timing instead of merging whenever the board gives you a match.
Merge Tanks doesn't ask for much: a browser tab, fifteen minutes of attention, and a willingness to lose while learning. It rewards patience more than speed, and the combo system — hidden as it is — gives the merge mechanic a tactical layer that most games in this genre skip. I'm still chasing a fifty-wave run. My best so far is forty-three, and I know exactly which greedy merge cost me the run.